
Jenkins is an open source automation server, which uses plugins to support building, deploying and automating projects. As an extensible automation server, Jenkins acts as a hub facilitating continuous integration and continuous delivery (CI/CD).
Simply put Jenkins is Cron-job on STEROIDS
Table of Contents
- Pre-reqs
- Stand alone installation
- Deploy on Application Server
- Install Jenkins as a Service
- Jenkins as Docker Container
Pre-reqs
Java is the only requirement and can be easily installed, using the following commands. I’m using jdk8 on Ubuntu 20.04
sudo apt update
sudo apt install -y openjdk-8-jdk
java -version
Once Java is installed, Jenkins installation can be done in any of the listed ways:
Stand alone installation
is the easiest option to explore & get familiar with Jenkins. This is not a recommended production setup, as stopping (ctrl+c) the Linux command (java -jar jenkins.war) would terminate the Jenkins session.
All that is needed is Jenkins war (web archive) file, which can be download from the official website –> https://www.jenkins.io/download/
mkdir jenkins
cd jenkins
wget https://mirror.gruenehoelle.nl/jenkins/war-stable/2.235.5/jenkins.war
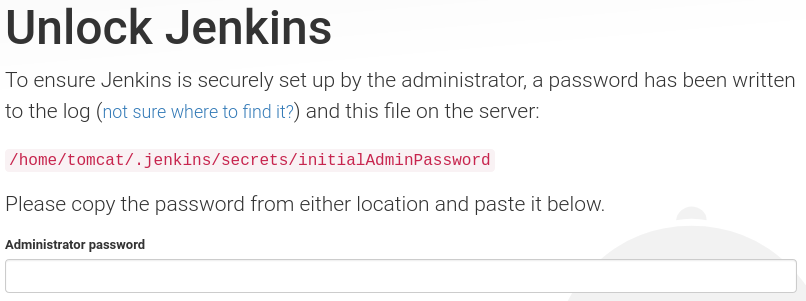
java -jar jenkins.warThe installation would reveal an initial password to proceed

Browse to http://localhost:8080 and wait until the Unlock Jenkins page appears.
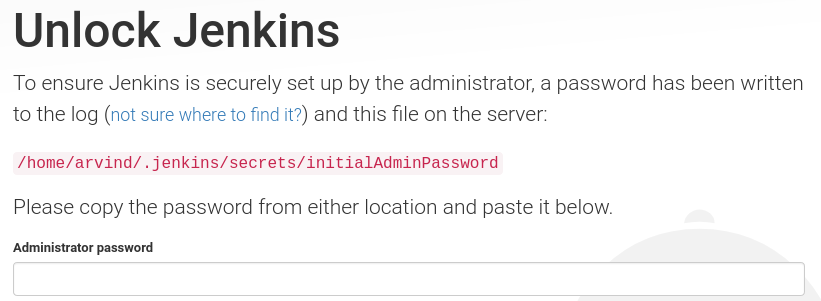
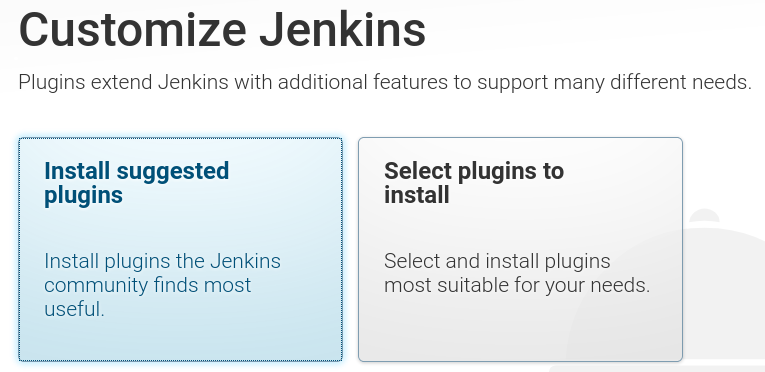
Use the initial password to unlock and ‘Install suggested plugins’ to customize Jenkins.
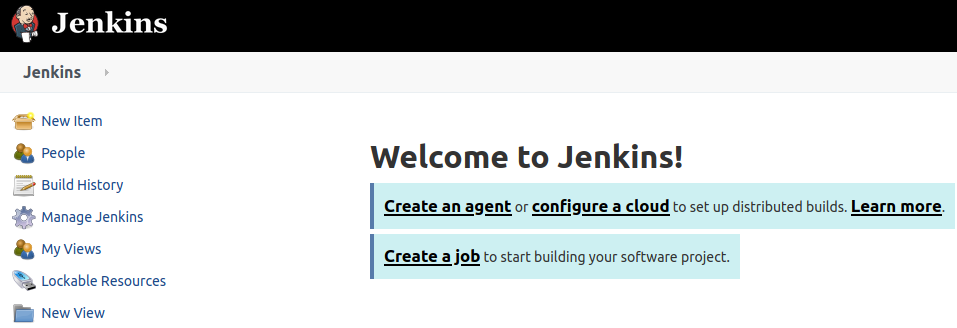
Fill the details in the following screen to land on the Jenkins home page and start exploring Jenkins
Deploy on Application Server
Install any application server & then deploy Jenkins application on top. This method is one of the preferred approach for a production installation as application servers are routinely managed as part of the landscape.
I’m using Apache Tomcat 9 as my application server & installing it by using these easy commands
sudo apt-get update
sudo apt-get install -y tomcat9
sudo service tomcat9 status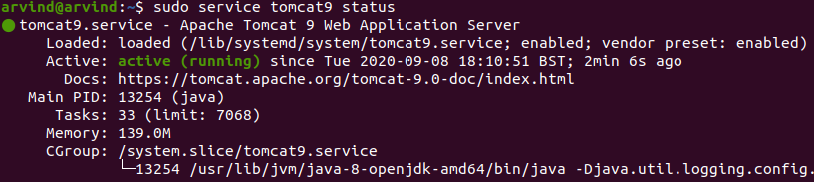
Once the tomcat server is up and running, place the jenkins.war file in the /var/lib/tomcat9/webapps folder & restart the tomcat service
sudo cp ~/jenkins/jenkins.war /var/lib/tomcat9/webapps/
sudo service tomcat9 restart
All seems OK and Jenkins should be accessible by browsing http://localhost:8080/jenkins, but instead you experience an error

This error happens because the Jenkins application is being executed by the tomcat user (created by the app server installation), while it’s expecting a jenkins user. There are 2 ways to resolve the issues
1- add tomcat user to sudoers
2- update JENKINS_HOME environment variable
But before moving forward with any of the approaches, good idea is to clear the earlier installation
sudo apt-get -y remove tomcat9
sudo rm -rf /var/lib/tomcat9
I am following approach 1 wherein a user ‘tomcat’ is created, added to the sudoers group, tomcat is re-installed & jenkins.war file copied to the webapps folder
sudo useradd tomcat
sudo usermod -aG sudo tomcat
su - tomcat
sudo apt-get -y install tomcat9
sudo cp /home/arvind/jenkins/jenkins.war /var/lib/tomcat9/webapps/
Now browsing to http://localhost:8080/jenkins would show the ‘Unlock Jenkins’ screen
Install Jenkins as service
Jenkins can also be installed using the package managers, like apt in case of Ubuntu
A LTS (Long-Term Support) release can be installed from the debian-stable apt repository.
wget -q -O - https://pkg.jenkins.io/debian-stable/jenkins.io.key | sudo apt-key add -
sudo sh -c 'echo deb https://pkg.jenkins.io/debian-stable binary/ > \
    /etc/apt/sources.list.d/jenkins.list'
sudo apt-get update
sudo apt-get install jenkins
This package installation will:
- Setup Jenkins as a daemon launched on start. See
/etc/init.d/jenkinsfor more details. - Create a ‘jenkins’ user to run this service.
- Direct console log output to the file
/var/log/jenkins/jenkins.log. Check this file if you are troubleshooting Jenkins. - Populate
/etc/default/jenkinswith configuration parameters for the launch, e.gJENKINS_HOME - Set Jenkins to listen on port 8080. Access this port with your browser to start configuration.
- If your
/etc/init.d/jenkinsfile fails to start Jenkins, edit the/etc/default/jenkinsto replace the line----HTTP_PORT=8080----with----HTTP_PORT=8081----Here, “8081” was chosen but you can put another port available.
- If your
All Done. Browse to http://localhost:8080 and wait until the Unlock Jenkins page appears.
Jenkins as Docker Container
Well if you wanna beat the queue and straight jump into the world of ‘Containers’, then install the latest version of Docker Daemon using these commands
sudo apt-get -y update && sudo apt-get -y upgrade
sudo apt-get insatll -y curl
sudo curl -fsSL https://get.docker.com -o get-docker.sh
sudo sh get-docker.sh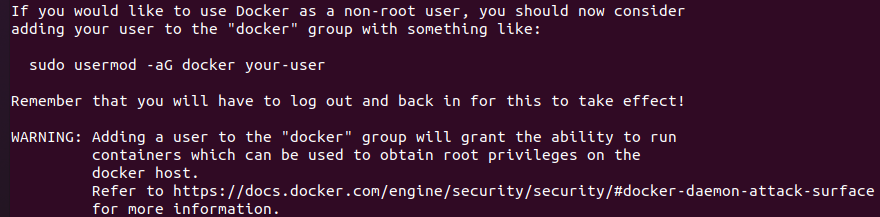
Any non-root user can access the Docker service once added into the Docker group & then start the docker service
sudo usermod -aG docker <username>
sudo service docker start
sudo service docker status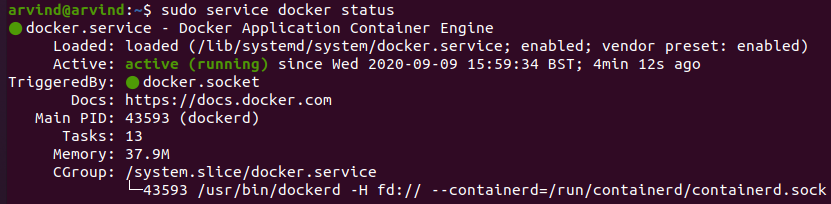
With the Docker Daemon up and running, Jenkins container can be launched using the following comand
sudo mkdir jenkins && cd jenkins
docker container run -d --name jenkins -p 8000:8080 kaushikarvind/jenkins-docker
Though there will be a detailed writeup on Docker soon, but for the time being the above command can be interpreted as
- docker container is launched in detached mode (enables one to get inside the container)
- container name is Jenkins
- using port 8000
- using the image tagged as kaushikarvind/jenkins-docker
Docker would pull the image from the hub and create a docker container

Listing of running docker could be confirmed by the following command
sudo docker ps -a
once all done, browsing http://localhost:8000 would bring up the ‘Unlock Jenkins ‘ screen. The initial password can be assessed from the jenkins directory
sudo cat jenkins/secrets/initialAdminPasswordIf not, then we’ll have to enter inside the container (interactive terminal) to access the password, by running the following simple commands and then Jenkins could be explored as describe above in the post
sudo docker exec -it jenkins /bin/bash
cat var/jenkins_home/secrets/initialAdminPassword
Hope the article is useful… more in-depth in the next article
till then Learn… Share… Grow…
Speak Your Mind